
I do lots of my creative journaling in my Hobonichi, but I also love all other things stationery. That includes the Midori branded Traveler’s Notebooks (TN for short). My first traveler’s notebook was a full size to utilize inserts when I travel. I would fill it with sketches and journaling while on a trip such as this Tokyo flip through. However, I was inspired by many friends at meet ups to use the passport size traveler’s notebook as a portable journal/wallet!
In May I visited Tokyo just in time to catch Traveler’s notebooks’ current release: the Camel traveler’s notebooks! It’s a color like caramel and a brown beige. I think it’s just the right color to carry for the summer.
So, i’m temporarily retiring my black traveler’s notebook until winter rolls around again. Here’s the unboxing of the set up I’ve prepared to turn my new Camel TN into a personal wallet!
- Passport Size Midori Traveler’s Notebook in Camel
- 004 Passport size plastic Zipper Case
- 010 Passport size Craft File
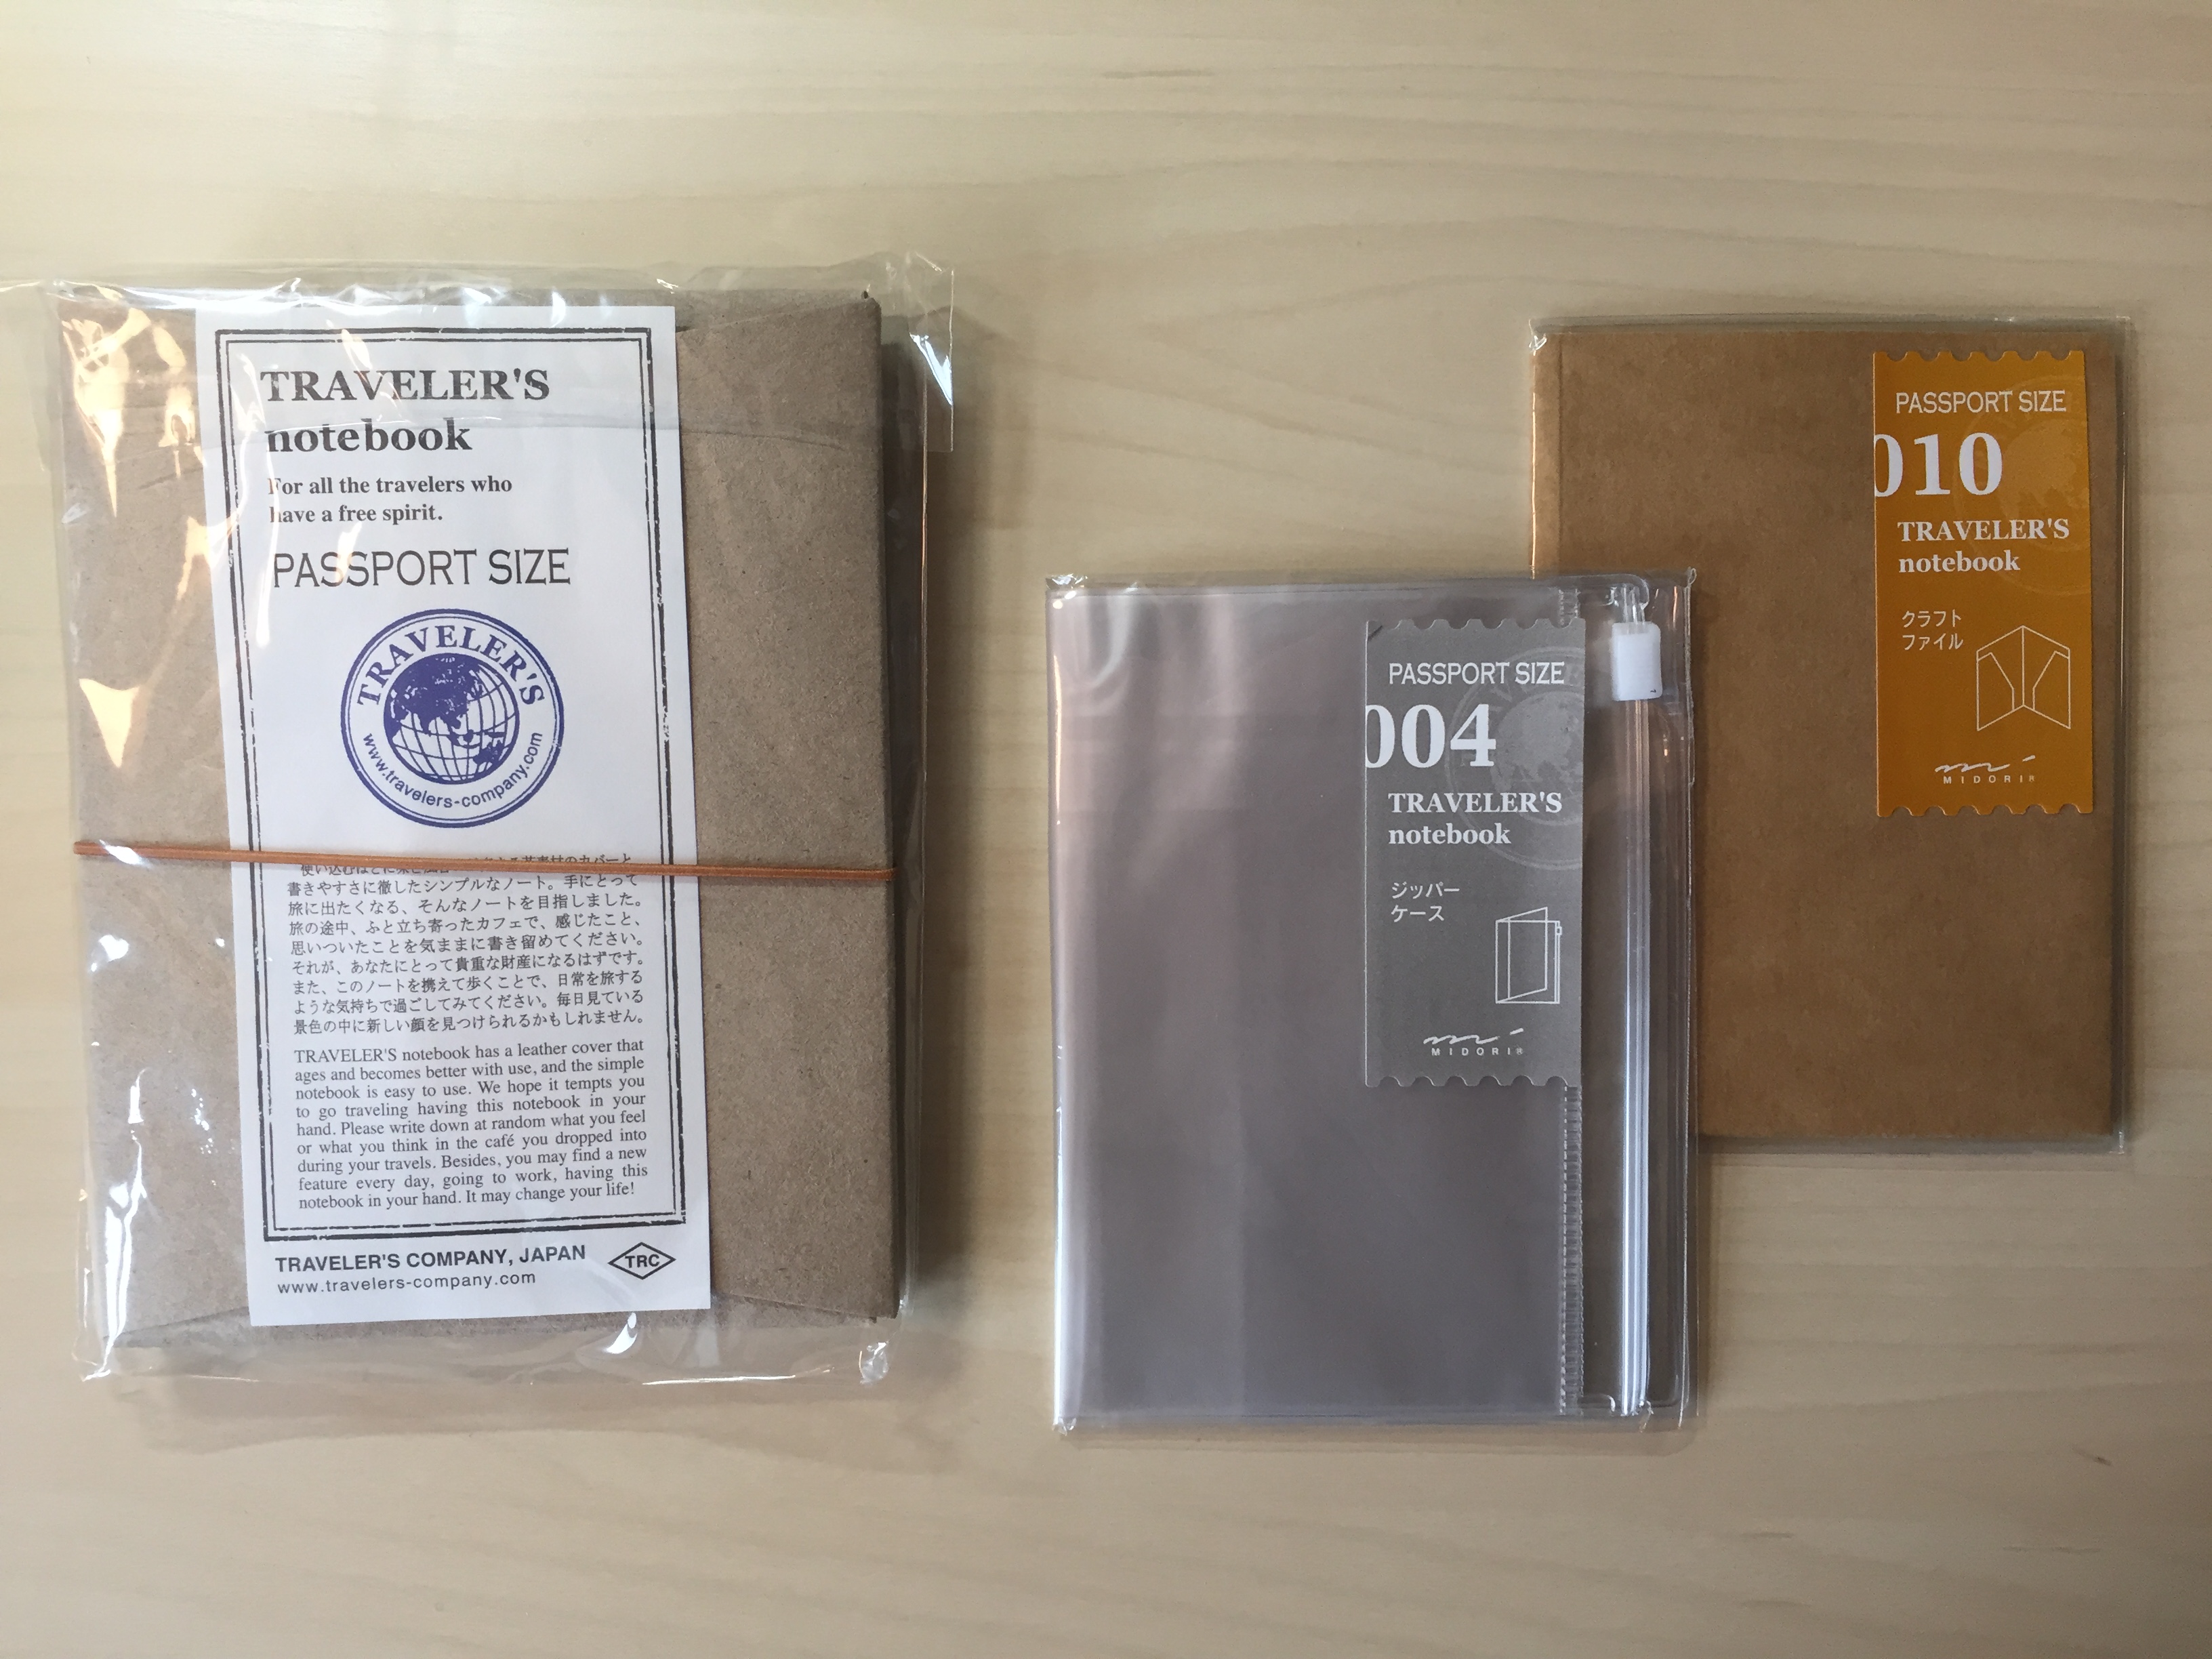
To have the traveler’s notebook function as wallets, the most important part is to have compartments. My old black traveler’s notebook only uses the plastic zipper case, but I decide to customize this new one with a Craft file as well.
Unboxing the Camel Traveler’s Notebook.

I’m so happy they included the green string to go with the Camel color (just like the Red string that pops on a black TN). They included extra rubber strings for the purpose of securing multiple inserts and accessories. I’ll only be using one in this case. Each new Traveler’s notebook set also comes with a blank insert (not shown in picture). I’ll be using that as my portable sketchbook when I finish with my latest insert.

Tip 1: Inserting the compartments accessories: The plastic zipper case goes in the base of the inserts, while the craft folder is layered on top.
Tip 2: Secure your cards in the card slots: The plastic zipper case has two card slots on one side, and a general slot on the other. I do find the card slots to be a bit loose if you only fill it with a single card. Which is why I ended up stuffing three cards in each slot so all of them are fitting securely inside the slots.
I also find it safer to not show your important IDs on the exterior. I’d place my student ID, public library ID, and Starbucks card on the outside 😉
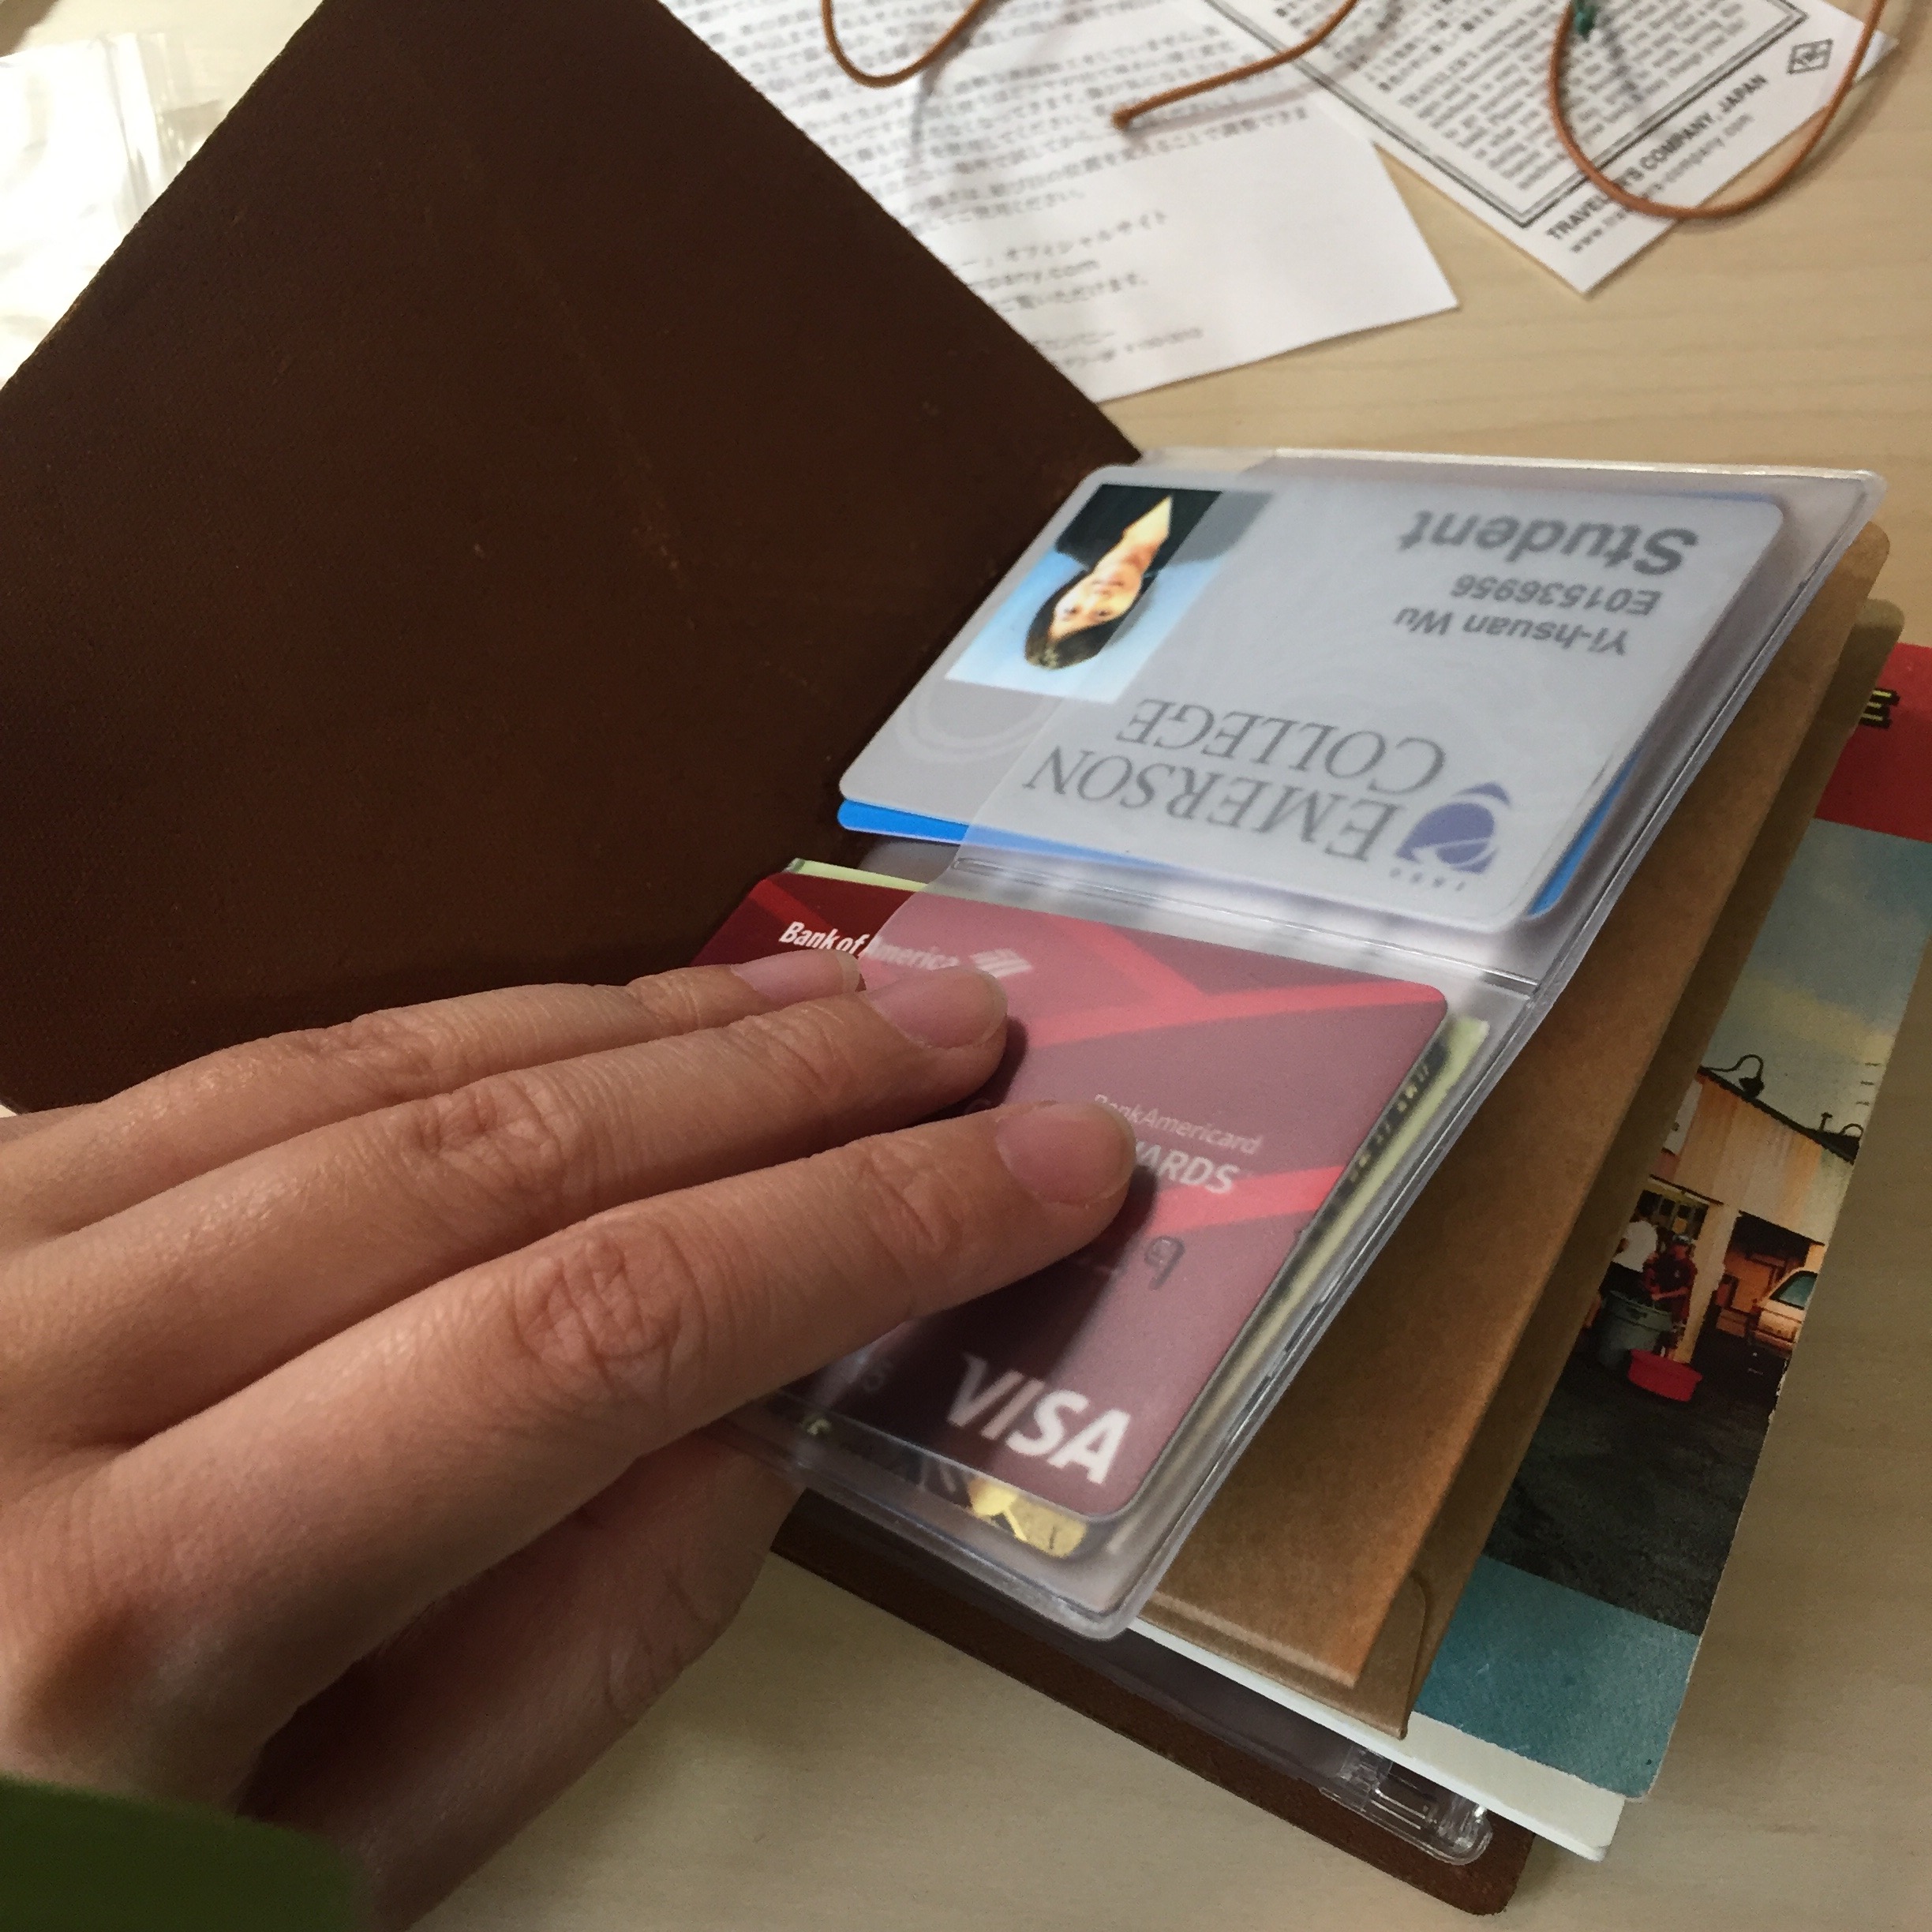
in the general slot, I placed my less important cards such as grocery and retail store point cards.

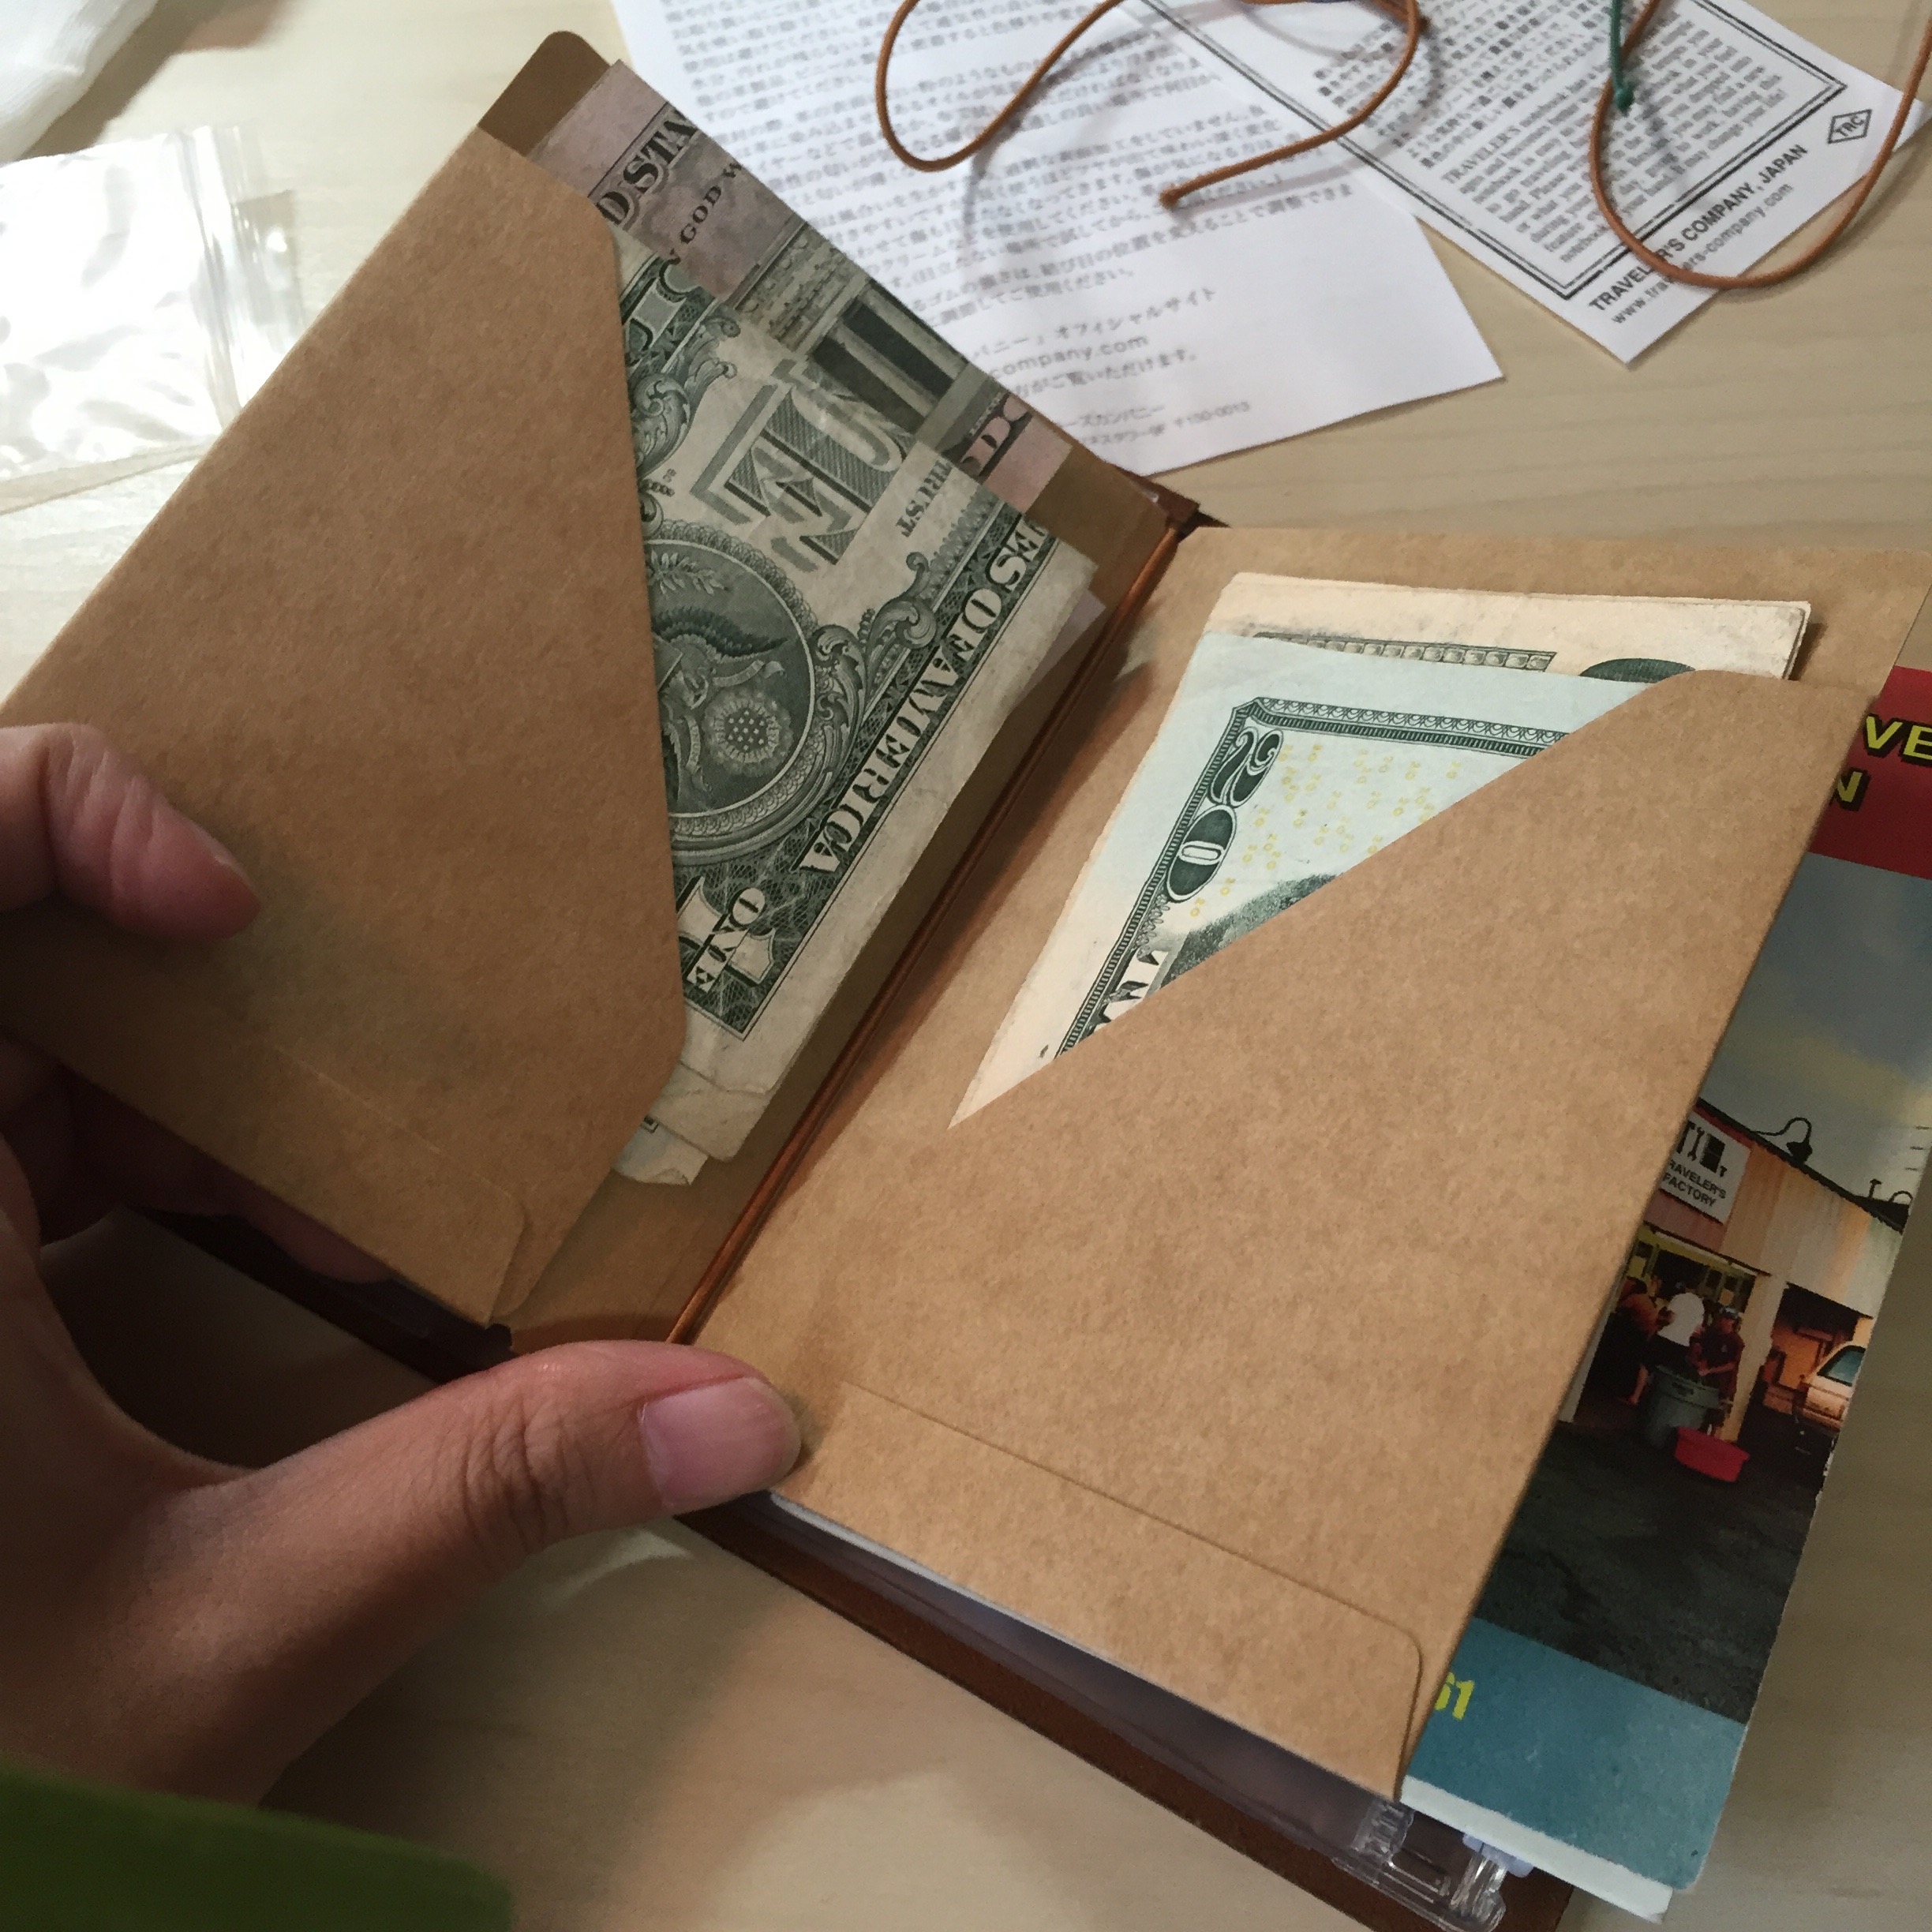
Tip 3: Organize your dollar bills in the Craft File: I used to stuff my paper bills in the general slot, but it is hard to retrieve when your TN is bulky. I also am paranoid that I might rip the plastic case itself. To solve that problem, the new Craft File insert has a folder like design so the bills can be retrieved and put away easily.
I’d organize my bills so i have the larger value ones on one side, and the dollar bills on the left.
Tip 4: Slip a notebook insert to take notes at all times: I am currently using the Hawaiian edition’s passport size blank insert.

You never know when you’ll find a notebook useful to jot down things people say. I purposefully did not secure it to the rubber string. This is so that I can take it out easily if I ever needed to write it on a different surface.
I would use it to take notes, doodle, do quick sketches, and write down questions or daily observations. It comes down to having a habit of writing with pen and paper. You never know when inspiration will hit, so always be prepared!

Tip 5: Use the zipper pocket for your coins: Lastly, I keep all my coins in the zipper coin. I’ll keep some occasional quarters and cents in this pocket. I would empty it regularly though, because it do weigh the whole wallet down. The zipper opens smooth enough, so it’s the perfect place to store your change.

I decided to use a new tag token for my new Camel TN as well. This is a bronze plate from Tim Holtz’s design. Now i’m gonna have fun decorating the craft file with more stickers!
See that glossy black TN in the background. The best way to temper the leather is just to use it as much as you can. I’ve been using the black TN Passport as my wallet for nearly 8 months, and the cover is bright and glossy from my skin’s oil LOL. It has also became soft and supple. I can’t wait to break in my new Camel and get it nice and glossy too!

Do you guys use a traveler’s notebook as a wallet too? Feel free to share your customization in the comments!

Reblogged this on Sovadea.
LikeLike
Thank you for sharing- I love this idea! Do you find that the craft folder keeps the paper money securely (they don’t fall out or anything)? I really enjoy your blog and how you give step by step explanations- it’s very helpful!
LikeLike
I think the craft holder keeps the paper money quite securely!
LikeLike
Hi, how do you put the token on your TN?
LikeLike
You have to untie the rubber cord from inside the cover to put the token through!
LikeLike
I just received my camel standard and I thought the color was more of a darker honey color and I was expecting more of a mustard tone. What shade is your camel passport. It looks darker, like mine. I was planning on exchanging it, but now I’m not sure. Thanks for sharing!
LikeLike
Hrm that is interesting. I would assume that the leather does look different under different lighting. One thing I would say is that the camel leather has grown much darker over use, so if you don’t like that evolvement, I wouldn’t suggest it!
LikeLike
exactly the information I was looking for.
LikeLiked by 1 person
Thanks for the information – I think I’ll give this a shot with a cheap amazon fauxdori to see how well I like this system.
LikeLike